Archives for June 2012

Breakfast Cookies


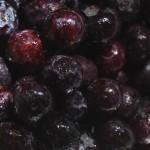
Almonds. Nature’s Rubies. Coconut.


I came upon this recipe in my Penzey’s Spice Catalogue.  It was submitted by a reader, it sounded good so I gave it a go and have made several batches since.

I am not a nutritionist, but these cookies seem to have alot going for them.  Cranberries, toasted almonds and coconut.  And yes, there is butter that gives these cookies there wonderful moistness but I think it is the cinnamon and almond extract that really bring all these lovely components together.

The only substitution I made to this recipe is that I forego the raisins and double up on dried cranberries because I love them so much. (see previous post: Nature’s Rubies)

I find that these are great on the go, too.  I have brought them with me on all day flea market outings, when traveling via the airport (better than the million calorie banana nut muffin) and they were even good on a half day hike that I did.

They are super easy to make.  I hope you enjoy them!

xoxo,

Cindy

Breakfast Cookies

2 sticks butter, softened

1 c. brown sugar

1/2 c. sugar

2 eggs, room temperature

1 t. pure almond extract

1 t. pure vanilla extract

1 and 1/2 cups flour

1 t. baking soda

1 t. cinnamon

3 c. oats (regular or  quick cook)

1 c. raisins

1 c. dried cranberries

1 c. baking coconut

1 c. slivered almonds (toast 10 mins. at 350 degrees)

Preheat oven to 350 degrees.  In a mixing bowl, cream together the butter and sugars until fluffy.  Add the eggs and extracts and beat well.  Add the flour, baking soda, cinnamon and oats and mix.

Fold in the remaining ingredients and stir until blended. Drop by the tablespoon onto ungreased cookie sheets and bake at 350 degrees for 14 – 16 minutes.

The Breakfast Cookie. Something For Everyone.


Anatomy of a Redesign – Part 1

I would describe myself as a nester.  I would also tell you that like alot of people, change is challenging.  However, you would never know these things about me by looking at my house and the evolution of my style over time.  I am constantly changing things around.

I never know when or why the inspiration to change something will hit me.  I had just such a moment in my dining room when I realized one small change would change the entire dynamic of my dining-living room space.

Once I have the idea of what I want to do, the next step is the floor plan.  Here is the current floor plan, to scale:

Dining Room Current Floor Plan

You can see from this lay out, the space is very small (narrow) so the options are limited.  The new floor plan will open up the space visually as well as practically, by improving traffic flow and allowing more space for the living room furniture by kicking it (slightly) into the plane of the dining room.  Here is the proposed new floor plan:

Dining Room Proposed Floor Plan

Here is the “to do” list:

  1. Build window seat
  2. Swag lamp over to new dining area
  3. Move antique cabinet to where the bench is
  4. Find a new home for the bench
  5. Make window seat cushions
  6. Remove leaf from dining table
  7. Store two of the four dining room chairs

Cost wise, this is a very economical re do that will have major impact.  The materials for the window seat should be $200, give or take.  Beyond that, since I already have the fabric, I only need some foam for the bench cushions which I would estimate to be appr. $50.

The result will be featured in next week’s blog article.

As always, thank you for stopping by!

xoxo,

Cindy

This will be removed and the bench (not pictured) will be removed and replaced with the antique cabinet shown in the picture below.

This area will be the new window seat/dining area and this cabinet will remain in the dining room, but moved to another place.

This won’t change, but will now become part of the window seat area for the dining table.


Visits to Upstate New York and Spaghetti Sauce


Spending your vacation in the stockades.


I’m Italian and many summers were spent with my mother’s family in upstate New York.  Upon arrival every summer, one ritual was to pay a visit to each and every household of our relatives.  Every house was full of the sights (plastic slipcovers on all the furniture and butterscotch candies in a dish) and smells of a typical old world Italian family.  The pungent smell of real parmigiana cheese and homemade sauce on the stove permeated every home without exception.

This recipe is one of my own but let’s give credit where it is due…my sister suggested some of the spices that eventually became the recipe.  It isn’t a particularly difficult recipe and it gets better come serving time, if you make it in advance by a couple of days.  The flavors meld really well together as each batch sits in the fridge.

The secret to this recipe is that I add some sugar which plays great against the red pepper flakes.  That is why I think of it as the sweet and the heat spaghetti sauce recipe.

Simple Homemade Spaghetti Sauce

1  medium onion, chopped

4  cloves of garlic, minced

1  pound of any ground protein of your choice (sausage, pork, beef, chicken, etc)

2  (28) ounce cans of Petite Diced Tomatoes

1  t. Fennel Seed

1  t. Dried Basil

1  t. Crushed Red Pepper

1  t. Dried Oregano

1/4  c. of sugar

1  t. salt

1/2  t. pepper

Warm 1 – 2 t. of olive oil in a saute pan; add onions and cook until translucent.  Add minced garlic and cook for 1 – 2 minutes more.  Remove from pan, set aside in a bowl and add ground protein into the saute pan and cook through.

In a separate bowl, mix the diced tomatoes, fennel seed, basil, red pepper flakes, oregano and onion/garlic mixture.  Take the mixture and place it in a blender (you may have to do it in two batches, depending on the size of your blender or you can use and immersion blender) and puree the sauce just until the tomato chunks and onions are reduced in size.  This should only take about 2 – 4 pulses with your blender.

Transfer the pureed sauce into a stock pot and add the ground protein of choice.  Stir in the sugar, salt and pepper and cook over low heat, covered for about 30-40 minutes and it’s ready to serve!

Fresh from the garden parsley and REAL parmesan cheese.

Freshly cooked pasta in a vintage collander.

Old Fashioned Comfort Food.


Antique and Vintage Glass


Etched Stoppers.


It is always nice when you find antique and vintage items that not only have charm and character, but are also completely functional.  Vintage and antique glass is just such an item that finds itself right at home for today’s living, even though many pieces are decades old and made for another time, another sensibility and another way of life.

Thank you to my good friend, Vince at Good Look, Inc..  He has been a great source for some my most recent vintage glass finds! Please stop by his store or visit him on facebook.  He has such great taste and style and finds so many interesting things!

Here are several pieces of my personal collection.  Enjoy!

Always,

Cindy

From my grandmother.  Makes me smile to think about her.

Beautiful Silhouettes.


Collection of Vintage Glass Apothecary Jars in a variety of shapes and sizes.

Beautiful etched pattern to hold bathroom items like make up remover, cotton balls and scented body powder.


Vintage Bail Wire bottles, mason jars and a vintage apothecary jar to hold lavender linen water.

I love the small scale of this vintage lab beaker; makes it fun to use.

Vintage Glass to hold all the cooking essentials: salt, pepper, vinegars and oils.

Vintage Compote.

Easy Breezy (and delicious) Upside Down Cherry Cake


Cherry Upside Down Cake.

The batter gets this amazing golden crust during baking and the sugar/cinnamon topping maintains a certain textural balance by melting into the batter in some places and not doing so in others.

This recipe really is so easy, it’s almost impressive.  I have adapted the batter from an Ina Garten recipe and Ina does what she does best which is to create great flavors with relatively few ingredients.  So easy a caveman could do it! (sorry…I couldn’t resist saying that).

However, where I modified the recipe made alot of difference for me.    Her recipe calls for a granny apple and cranberry pie-like filling.  For my taste, the filling was too tart so I made a substitution with cherry pie filling and I think it tastes much better.  Truthfully, you can use any fruit pie filling because they are all complimented by the delicious batter.  My mother’s favorite is blackberry…so I always stock up when it is in season.

Now, if you are a purist…you can make homemade cherry pie filling.  I used canned filling because I quite like the taste of it and when I am entertaining and can find a way to make my life easier after all the shopping, cooking and cleaning…I am taking that route.

It is an every day favorite or just perfect for the holidays…either way, it is a sure fire EASY crowd pleaser.  Enjoy!

All American Easy Upside Down Cherry Cake

  • 2 extra-large eggs, at room temperature
  • 1 cup plus 1 tablespoon granulated sugar
  • 1/4 pound (1 stick) unsalted butter, melted and slightly cooled
  • 1 teaspoon pure vanilla extract
  • 1/4 cup sour cream
  • 1 cup all-purpose flour
  • 1/4 teaspoon kosher salt
  • 1/8 teaspoon ground cinnamon
  • 1 can of pie fruit filling of your choice or home made pie filling of your choice

Directions

Preheat the oven to 325 degrees F.

In the bowl of an electric mixer fitted with the paddle attachment, beat the eggs on medium-high speed for 2 minutes. With the mixer on medium, add 1 cup of the granulated sugar, the butter, vanilla, and sour cream and beat just until combined. On low speed, slowly add the flour and salt.

Pour the pie filling evenly into a 10-inch glass pie plate. Pour the batter over the fruit, covering it completely. Combine the remaining 1 tablespoon of granulated sugar and 1/8 teaspoon of cinnamon and sprinkle it over the batter. Bake for 55 to 60 minutes, until a toothpick inserted in the middle of the cake comes out clean and the fruit is bubbling around the edges. Serve warm or at room temperature.

Delicate Crust on Top with Light and Airy Cake Batter Below.

The cake batter is truly amazing.  It develops this thin, delicate crust while baking and with the cinnamon and sugar on top, it is heavenly tasting all while the cake itself is flavorful and airy.

Amazing Taste.

You can see here that the crust is slightly flaky which helps give it some great taste and texture.


Coastal Leanings

The Simple Joy.

To the Sea, to the Sea.

I must go down to the seas again,

for the call of the running tide

Is a wild call and a clear call

that may not be denied.

My style has slowly evolved from Early American Primitive into New England Coastal Cottage.  Throughout my little shangri la are small references to the place that I long to be, all against a coastal inspired light palette.

Little Cottage Lamp filled with Seashells.

Sea Inspired Colors on a vintage tin.

Old Maritime Pewter.

Shiplap and Portal Inspired Mirror.

Gifts from the Sea in a Hurricane Lamp.

Coastal Design for leisurely reading.

Nautical Lantern from the Rafter.

Vintage Ship Model and Poets Lantern.

Rosemary Orange Mustard


Three Favorites.


I love the feeling of accomplishment when you do something for yourself.  This is a DIY blog, after all:).  My latest attempt at home made is making mustard from scratch.  I never really thought about making mustard from scratch until I accidentally came across a recipe from a culinary blog.  Further mining of the Internet yielded a recipe that includes two of my favorite flavors/ingredients: rosemary and orange.

So I gave it a go.  Although the recipe calls for grinding the mustard seeds a bit more, I showed some restraint and kept them close to whole, only grinding them enough to release the flavor from the seed.  I also used only yellow mustard seeds, even though the recipe calls for both yellow and brown.  I did this to keep the heat to a minimum (brown mustard seeds have more heat than yellow).  Even with the substitution…there is still plenty of heat.

The taste is something else because each flavor (orange, rosemary, cider vinegar, white wine) is pronounced and distinctive.  However, my research suggested these flavors will mellow out after a few days and they did.  I enjoy it as a condiment and marinade of sorts when roasting proteins.  It works equally well for both, particularly the latter.

This kind of recipe is very personal and might benefit from some trial and error to get the taste and consistency the way you like it.  For me, I preferred slightly less of each liquid.  Although the mustard did congeal over a couple of days, I still found it not to be viscous enough for my sensibilities so I modified it the second time around.  Have fun and good luck!

Always,

Cindy

The Basics.

A Simple Mix.

Bail Wire Jar with Chalkboard Label.

Rustic & Homemade.


Here is the recipe from www.apinchof.com:

Rosemary Orange Mustard

This grainy mustard is spicy hot but great for cooking or dipping pretzels.  The flavor improves after a few days so plan accordingly.

1/4 c. of yellow mustard seeds

1/4 c. of brown mustard seeds

1 and 1/2 T. of mustard powder

1/4 c. of water

1/4 c. of cider vinegar

1/4 c. white wine

minced zest of one orange (about 1 heaping tablespooon)

juice of same orange

1/4 c. of minced rosemary

few dashes of salt, to taste

In a blender, grind the mustard seeds to the texture of cornmeal.

Transfer to a small bowl and stir in remaining ingredients.

Allow to sit at room temperature for a couple of hours.

Stir again and taste for salt, adding more if desired.

Store covered, in the refrigerator for up to a month.

Yield: 1 cup of mustard