
Re-posting this blog article because it is one of the most requested articles from my site. I am still thinking about the variations on this technique and when I will have time to share them…
In the mean time, I hope you find some inspiration.
Always,
Cindy

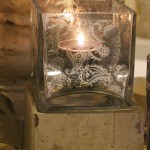
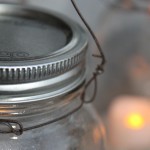
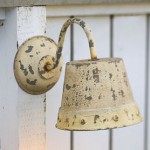
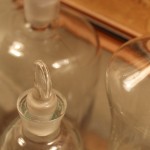
Twinkly Light. Just lovely.
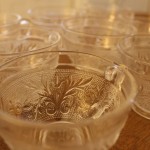
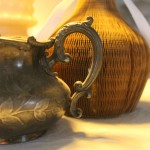
I like a little mercury glass for that touch of elegance that it brings. Flash photography can’t quite showcase the twinkly quality of the mirrored paint effect, however, in person…it is just lovely.
Since my post yesterday, I have gotten quite a few emails asking about the technique used to make this antiqued, mercury glass votive. I was planning to post this later in the week, but have moved the post up a couple of days because of the requests.
Let’s get started!
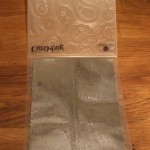
Here is what you will need for this project:
- Glass vessel
- Looking Glass Paint (online or at Walmart in the spray paint section)
- Embossing folder/machine
- Paint tape
- HVAC tape (also called foil tape, it is 2″ wide and is found at home center stores, like Lowe’s)
Before you get started there are two important things to follow explicitly in order to have success, and trust me on this…I made these mistakes a few times:
- When you have applied your foil tape to the glass: BURNISH, BURNISH, BURNISH. Simple finger pressure will do, but if you don’t press down on every part of the foil, you risk not having a clean image remain when you pull the tape off.
- When you paint the glass vessel, go very, very lightly on the paint. Micro bursts of paint with very thin coats. You don’t want more than two coats and don’t try for heavy coverage…the tape won’t be able to remove the negative space so that the image emerges.
Lastly, no worries. If you mess up, just scrub the inside of the glass with a sponge and some elbow grease and the paint will come right off and you can start over.
As a foot note for this project, I tried this technique with other paints…but it doesn’t work. I tried using a copper paint for a fall project and regular spray paint has different properties and the tape usually takes the entire spot of paint off with no image remaining.
Just have fun. This is a technique that has a lot of possibilities…only limited by your imagination!
Send me pics of your finished product and I will post in a future blog article!
Always,
Cindy
Remember to click twice to bigify!
-
- Twinkly Light. Just lovely.
-
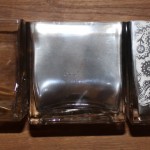
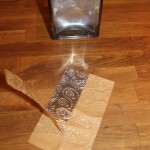
- Before. During. After. (“After” image with a light background insert for photo only)
-
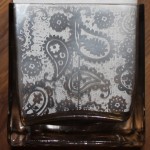
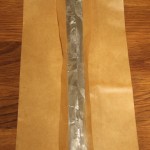
- Step 13: Once the tape has been burnished, pull away from glass. The embossed image will remain.
-
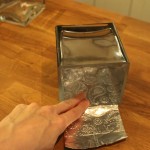
- Step 12: Burnish foil tape down with your fingers. Burnish every centimeter of the foil in order to get a good image transfer
-
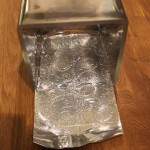
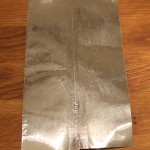
- Step 11: Press the foil (stick side towards glass) on the inside of the glass vessel, right on top the paint.
-
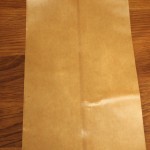
- Step 10: Peel off paper tape on back of foil, exposing the adhesive.
-
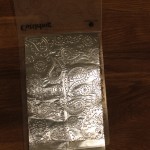
- Step 9: Embossing Completed. Foil is the right thickness to accept the embossing pattern very well
-
- Step 8: Emboss.
-
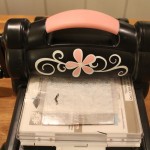
- Step 7: Place seamed tape into embossing folder.
-
- Step 6: You have now created one, almost seamless piece of tape.
-
- Step 5: Repeat with the second piece of overlap paper: fold back in place and burnish.
-

- Step 4: Replace the adhesive backing paper and burnish the overlap seam as you go.
-
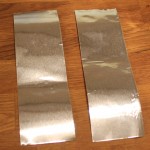
- Step 3: Overlap the two pieces of tape about an eighth of an inch.
-
- Step 2: Fold back adhesive paper, lengthwise, about a half inch.
-
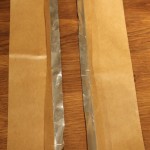
- Step 1: Cut two pieces of tape.
-

- Prep:Tape top edges of glass vessel and coat with two VERY LIGHT coats of Looking Glass Paint.
-
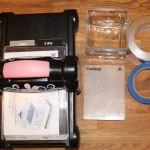
- What you need to get started.


Speak Your Mind