It seems appropriate to re-post my very first blog article that I published almost a year ago. I still love my “new” kitchen. I hope you enjoy the transformation and find some inspiration for the new year.
Always,
Cindy

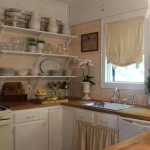
After.

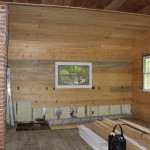
Demolition.


More. Free. Labor.
I’m in love with my cottage. However, the kitchen left much to be desired. I have lived in the house for almost nine years, and only done minor painting to the cabinets and had the floor professionally done a couple of years ago. In October, hankering for a change, I wanted to re do the kitchen in a really impactful way under two important conditions: a budget of $1500 and cosmetic changes only. I had to work with the existing flaws of the kitchen. No ripping down sheet rock, no moving electrical junction boxes, etc and nothing structural.
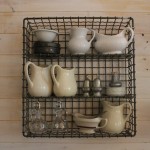
I just longed for something simpler. For a while, I wanted everything on display. Scouring antique stores, ebay and flea markets…everything had to have a great container so it could be on display. But too much of having everything on display starts to feel cluttered and the kitchen never felt clean…even though I clean on a regular basis. Plus it was kinda exhausting making sure everything was always looking perfect because it was all out in the open. Some closed door storage and major editing was in order.
Truth be told, I met only one of those two goals. I went over budget by $321 because of taxes, delivery fees and unforeseen product substitutions that were more costly.
Still, it is a darn good kitchen for the money. It is a very personal kitchen, not just because I did the work but because it navigates the way I do. Having lived in the house for almost nine years prior to this undertaking, I inherently knew and understood what I wanted and needed out of the kitchen. I am not sure I would have the same harmony with a kitchen that I designed and built without having lived in the house first.
I did all the work myself in 14 days, but I have to share that my wonderful neighbor, Darlene Kirksey, spent a day helping me install the counter tops which were too heavy for me to lift on my own and my ever helpful yard man, David Keel helped me with demolition on Day One. Props to my lovely friend/neighbor Kathy Burt for bringing me a sweet surprise of dinner from my favorite burger joint since my kitchen was torn up and I was way too tired to fix even a sandwich. Lastly, I need to thank Gus Tinajero, the GM at IKEA and his assistant. He worked, in good faith to get me the countertops I wanted and offered GREAT customer service. Over the next few weeks, I will be highlighting several individual projects within the renovation:
- Beautiful spice storage using lab bottles (click here)
- DIY Pendant Lamps (click here)
- Re-purposing an upper cabinet as a lower cabinet
- Re-engineering a four drawer cabinet for the better
- New life for old cabinet doors (click here)
- DIY roman blinds (easy peasy for anyone, even a beginner)
- Pantry Pride (click here)
- Organizing recipes with a deconstructed book
Here are the before and after pictures. It’s a little hard to tell in some of them, but the after pics are shown directly to the right of the same spot in the before pics. For additional kitchen and home tour pics, click here. Let me know what you think!
Remember to click twice to bigify!
Love Always,Cindy
As a post script, I am submitting this article for consideration for a feature in Cottages & Bungalos. Stop by the blog when you have some time, there are some terrific entries already:
[hana-code-insert name='cottagesbungalos' /]
[hana-code-insert name='Half Banner' /]
-

- Demolition.
-
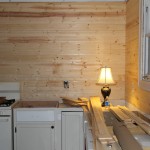
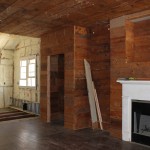
- Progress.
-

- Free. Labor.
-
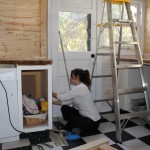
- More. Free. Labor.
-

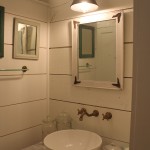
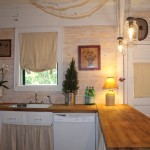
- Before. Sink and Window Area.
-
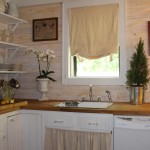
- After.
-

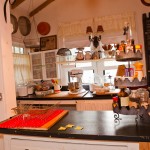
- Before. Right of the Sink Area.
-
- After.
-

- Before. Open Concept Pantry.
-

- After. Formerly the pantry, now the new fridge area.
-
- Before. Baking Center.
-
- After.
-
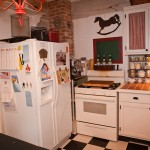
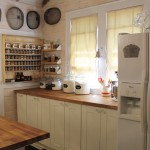
- Before. Fridge Area.
-

- After. Formerly the fridge area, now the new pantry.
-
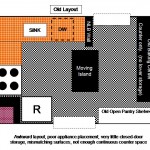
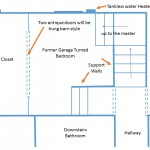
- Before. Old Kitchen Layout.
-
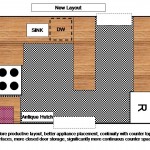
- After. New Kitchen Layout.
[hana-code-insert name='cottagesbungalos' /]