Pretty Holders

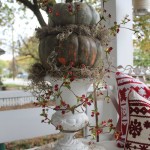
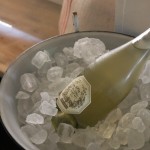
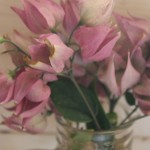
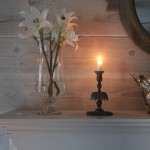
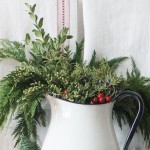
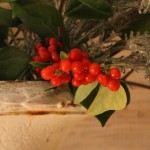
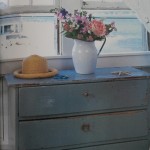
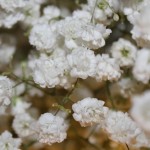
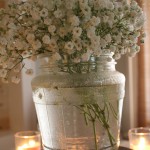
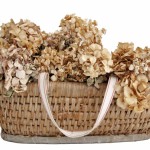
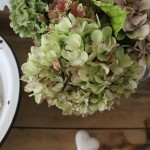
End of season flowers in a miniature, vintage glass pitcher.

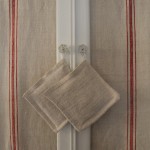
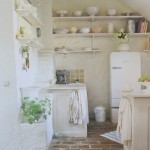
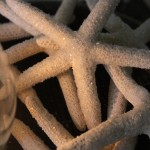
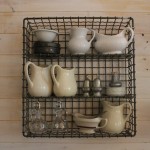
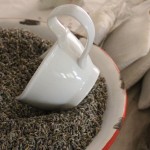
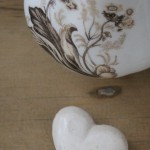
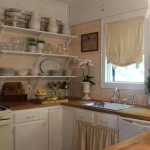
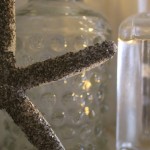
I am always on the hunt for pretty little things that can be used in very practical ways for home keeping and organizing.  These lovely little shells do the trick as soap and sponge holders in my cottage kitchen.  As my style has evolved into a more coastal style (see a previous blog article, Coastal Leanings) they fit right in.

I picked up these two little shells from my good friend, Vince at GOOD LOOK, Inc. around the corner in Princeton, Texas.  I am grateful to know him, as he reminds me and helps me every day to see the beauty in simple things. He has recently opened an online shop where he offers his beautiful antiquities at secondshoutout.com.  His wonderful eye and great style are available to the masses since he now ships.  Please give him a look, you’ll be glad you did.

What pretty little things can you use to organize your home?

I hope you find some inspiration.

xoxo.

Cindy

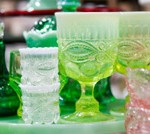
Faint hues from faded flowers and handmade lavender and oat soap.

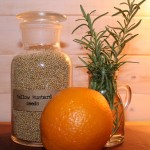
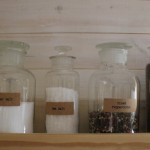
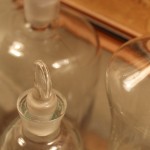
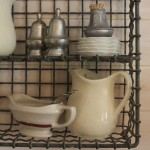
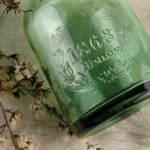
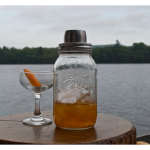
 Vintage bottle for soap, vintage pitcher for flowers and lovely little shells for soap and sponge caddies.

[hana-code-insert name=’cottagesbungalos’ /]


Spicing It Up With Old and New Lab Jars


Lovely kraft paper labels to add some vintage style.

I used to store my spices in small round tins with vintage labels.  That worked for a while, but at some point I decided I wanted glass jars.  Searching high and low in the Internet, I finally found the ones I wanted at a lab supply warehouse.  As I was jumping around their website, I came across amber etched stopper bottles and decided they would be great as vessels to hold and preserve my extracts.

Using a mixture of old apothecary jars, vintage squat jelly jars, new amber jars, larger tins and clear, straight sided jars, I was able to store each kind of item conveniently along with adding visual interest that variety brings.

I built the shelves for these items to fit the space.  The spice shelf was built to be inset in a window that is permanently sealed shut that is in exactly the right spot to be able to grab and go anywhere in the kitchen.

I hope you find some inspiration.

xoxo.

Cindy

Old and new jars to hold each kind of item.

Inset in a sealed window that is easy to display and convenient to access.


Old apothecary jars to hold larger quantities.

[hana-code-insert name=’cottagesbungalos’ /]

My Blog Featured by Cottages and Bungalos Magazine Talent Scout


Clever Vintage Kitchen Organization Solutions Featured at Whisperwood Cottage Blog, Talent Scouts for Cottages and Bungalos Magazine.


My lovely friends at Whisperwood Cottage, who are also talents scouts for Cottages and Bungalos Magazine,  featured my blog in their article about vintage kitchen storage.  Happy to be chosen and happy to be featured.  Thanks so much!

[hana-code-insert name=’Curtain Feature’ /]

To get to the article, click here.

Using the Vintage for Storage


A variety of vintage and antique containers.

For a long time, I used to collect vintage aluminium measuring spoons that came in a set, held together with a small ring.  The problem, however, was that aluminum does not come through a wash cycle in the dishwasher very well and keeping them on a ring was necessary to keep them from getting lost…but kind of inconvenient for practical use.  It seemed that being able to grab them and use them individually made more sense…but I wanted to find spoons that were more substantial and had some style to them.

I was perusing an import store and found a set of white china measuring spoons for a very reasonable $2.99 a set and decided on the spot that I wanted several sets to break apart and use a variety of little vintage containers that I already had in my collection.

Even the most functional storage can be beautiful and useful.

I hope you find some inspiration.

Always,

Cindy


Stored by measurement, as a group.

Organization that Works!

[hana-code-insert name=’cottagesbungalos’ /]

Opportunity for Refinement


Vintage Eastlake Frame.

Alabaster.


White Field Flowers.

Gray Antique Wood.

Ironstone.


Vintage Eastlake Frame. Alabaster. White Field Flowers. Salvaged Wood. Ironstone. Similar in tone, but different in texture and all present an opportunity for refinement.

Lovingly, I say that my kitchen is not the most refined kitchen.  It doesn’t have high end finishes like carrera marble, a tiled back splash or a sparkly chandelier.  It is a simple straightforward space with plenty of opportunity for refinement.  I try to think of it in terms of being a room, not a kitchen.  This opens up my thinking when making these small, but impactful changes.

This particular vignette started out with decorative objects that were holdovers from the kitchen before I embarked on my budget friendly remodel.  My eye and taste have evolved and I am now setting about to fine tune the style of the kitchen to flow better with the rest of the house.

An antique jug lamp, vintage soda bottles, a bread board and a folk art painting have been replaced with an alabaster lamp, a beautiful ironstone pitcher, an eastlake frame with a 250 year old nautical print and a newish mercury glass hurricane globe paired with and perched on top of an architectural and antique baluster do the trick.  These small changes have added a great deal of style to the entire kitchen.  The are the first thing you see when you enter the house and the first thing you see when you enter the kitchen and they set the tone for the entire house.

Thanks to my good friend and great shop owner, Vince at Good Look, Inc located the lamp, Eastlake frame and ironstone and Nancy at Ella Elaine, here in DT McKinney was the source for the mercury hurricane.  They both have such wonderful taste and style that I have benefited from.  Thank you!

Take a look and see what you think.  I hope you walk away with some inspiration!

Always,

Cindy

Before.

After.


Antique Find: The Delicate Workhorse


I found this lovely gem several weeks ago in Downtown McKinney and it has quickly become treasured and useful.  Engenius in its’ own way with telescoping supports that allow you to straddle it over a sink so it can do the work it was intended for, yet it stays out of the way when you want to use the sink otherwise.  My new found favorite.

The Vintage Food Strainer.

Delicious Loveliness.

The Almost Delicate Work Horse.

Let me know what you think!

Love Always,

Cindy

[hana-code-insert name=’Half Banner’ /]

Featured In…


The lovely folks at Whisperwood Cottage featured my kitchen in an article about window treatments.  Click on the icon below to see:

[hana-code-insert name=’Curtain Feature’ /]

Love Always,

Cindy

[hana-code-insert name=’Half Banner’ /]


DIY Pendant Lights

Completed Lamp.

Completed Lamp.


Lighting had always been an issue in my kitchen but since the renovation had a strict budget…I had to be very creative.  I needed some lighting over the new peninsula and the solution seemed to be to swag the lighting over from the only ceiling junction box in the kitchen.

All the pendant lights that I looked at, even the simpler designs were budget busters…so I resorted to making my own when I came upon some hurricane globes at Michael’s.  The shape of the globes really spoke to me and I already had an idea to use some rustic, vintage, scalloped tart pans as an embellishment to hide the wiring.

Including the globe, lamp parts and wiring, each of these lamps came in at about $11 each.  I also spent $10 on a special drill bit that was used to drill the hole in the bottom of the globe.

If you want to try a project like this on your own, one thing to look for are glass vessels that don’t have super thick bases.  Thicker bases can take 30 minutes or so to drill through and they can fry your glass drill bits. If you find a beautiful glass vase or vessel that has a thick base that you simply must use…take it to the closest glass shop. They will usually drill the hole for you at a cost of $15 – $25 per hole.   It can get a bit pricey…so just a fair warning from the voice of experience!

xoxo.

Cindy, Samantha and Lillie.

As a post script, I am submitting this article for consideration for a feature in Cottages & Bungalos.  Stop by the blog when you have some time, there are some terrific entries already:

[hana-code-insert name='cottagesbungalos' /]

[hana-code-insert name=’Half Banner’ /]

Nature’s Rubies

Nature's Rubies


Dough Crossing.


Kneadful Things.


Three smaller loaves for sharing.


Ready for the oven.


Deliciously crusty and golden.


Heavenly.


I love this recipe because it can be made on the spur of the moment because it doesn’t require the pre-softening of butter or leaving eggs out in advance.  I make one substitution to the recipe below, using craisins instead of currants.

Besides cranberries (or craisins) I love this recipe because it uses orange, one of my favorite flavors.

This is an Ina Garten recipe.  As usual, she makes great impact with few ingredients.

Enjoy!

xoxo.

Cindy, Lillie and Samantha

Orange Cranberry Irish Soda Bread

Ingredients

  • 4 cups all-purpose flour, plus extra for currants
  • 4 tablespoons sugar
  • 1 teaspoon baking soda
  • 1 1/2 teaspoons kosher salt
  • 4 tablespoons (1/2 stick) cold unsalted butter, cut into 1/2-inch dice
  • 1 3/4 cups cold buttermilk, shaken
  • 1 extra-large egg, lightly beaten
  • 1 teaspoon grated orange zest
  • 1 cup dried currants

Directions

Preheat the oven to 375 degrees F.  Line a sheet pan with parchment paper.

Combine the flour, sugar, baking soda, and salt in the bowl of an electric mixer fitted with the paddle attachment.  Add the butter and mix on low speed until the butter is mixed into the flour.

With a fork, lightly beat the buttermilk, egg, and orange zest together in a measuring cup.  With the mixer on low speed, slowly add the buttermilk mixture to the flour mixture.  Combine the currants with 1 tablespoon of flour and mix into the dough.  It will be very wet.

Dump the dough onto a well-floured board and knead it a few times into a round loaf.  Place the loaf on the prepared sheet pan and lightly cut an X into the top of the bread with a serrated knife.  Bake for 45 to 55 minutes, or until a cake tester comes out clean.  When you tap the loaf, it will have a hollow sound.

Cool on a baking rack.  Serve warm or at room temperature.